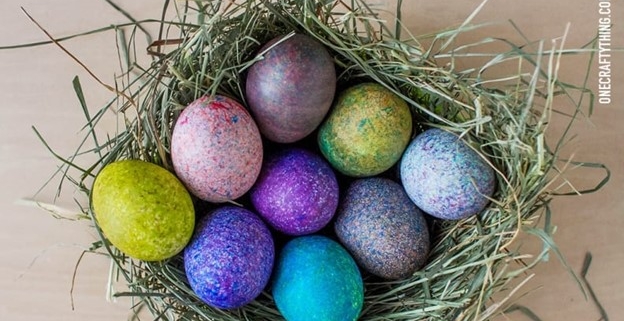
Five Unique Twists on Spring Egg Dyeing
Spring egg dyeing is a cherished tradition that brings families together to celebrate the joy and renewal of the spring season. While dyeing eggs with colorful tablets is a convenient and affordable method, you may want to spark your child’s imagination and add an element of surprise this year by trying something different. From dazzling speckles to funny ninjas, these novel egg ideas promise hours of entertainment and delightful results.
For each of these crafts, you’ll need a dozen hardboiled eggs, cooled. To hard-boil an egg, place it in a pot of water, bring the water to a boil, then let the egg cook for about 10-12 minutes before cooling it in cold water.
1. Speckled Eggs

- A disposable cup with tin foil or plastic wrap over the top (older kids)
Or a plastic container with a lid (younger kids)
- ¼ cup uncooked rice per container
- 15-20 drops of gel food coloring per cup
- Hard-boiled eggs, cooled completely
Steps:
- Fill the plastic container halfway with uncooked rice.
- Add 15-20 drops of different food coloring to the rice in each container.
- Close the lid and vigorously shake to distribute the color.
- Waiting 15-30 minutes before rolling your hardboiled egg in the color.
- Pat race onto the egg to make the color stick and let the eggs dry on a paper towel.
2. Shaving Cream Marbled Eggs

- Shaving cream (white, unscented)
- Food coloring
- Toothpicks
- Hard-boiled eggs, cooled completely
Steps:
- Fill a shallow tray of dish with a layer of shaving cream.
- Use the back of a spoon to spread the shaving cream evenly.
- Add drops of food coloring randomly on top of the shaving cream.
- Use a toothpick to gently swirl the colors into the shaving cream.
- Roll each egg in the colored shaving cream until fully coated.
- Gently place the eggs on a paper towel-lined tray and let them sit for 10-15 minutes.
- Carefully wipe off the shaving cream with a paper towel to reveal a vibrant marbled design.
3. Ombre Eggs

- Food coloring
- Plastic cups or bowls
- Vinegar
- Water
- Hard-boiled eggs, completely cooled
Steps:
- Rest your egg on top of a bottle cap inside a wide, flat-bottomed 8 oz glass.
- Combine ½ cup of boiling water with 1 tsp of white vinegar and 40 drops of food coloring.
- Add the solution to the cup until the egg is ¼ submerged. Soak for 5 minutes.
- Add clear, warm water to the glass until the egg is ½ submerged. Soak for 3 minutes.
- Repeat the process for one or two more stripes, pouring water and waiting 2 minutes.
- Remove the dyed egg from the glass with tongs and let it dry.
4. Modge Podge Eggs

- Mod Podge (or school glue mixed with a little water)
- Tissue paper cut into various shapes (larger shapes recommended for younger children)
- Sponge brush or paint brush
Steps:
- Using a sponge or paint brush, apply Mod Podge onto the surface of the egg.
- Place pieces of tissue paper onto the Mod Podge-covered egg.
- Apply another layer of Mod Podge on top of the tissue paper, pressing to adhere it to the egg.
- Continue adding tissue paper pieces and applying Mod Podge until the entire egg is covered.
- Allow the eggs to dry in the carton, rotating them occasionally to prevent sticking.
5. Egg Ninjas

- Black and skin tone acrylic paint
- Paintbrush
- Black Sharpie
- Silicone glue (or a glue gun)
- Thin silk ribbons in various colors
- Toothpicks
Steps:
- Draw an oval shape on the egg using a pencil or marker. (Pro tip: Brown eggs work best!)
- Using your brush, paint the rest of the egg with black acrylic paint.
- Using the glue, attach two toothpicks vertically on the back of the egg like crossed swords.
- Use glue to create the ninja’s belt with the silk ribbons.
- Draw the ninja’s eyes and eyebrows with a black sharpie.
- If necessary, trim the tips of the toothpicks so the egg stands upright.


